Showing posts with label Truck N Trailer Helpful's. Show all posts

Wednesday, July 20, 2011

Loft Remodel

We've been meaning to fix up the loft so LJ can have his own room, but I've really held back because safety was a big concern.  He's still so young and the loft is pretty high up.

I've been letting him play up there for months but only when I was able to keep my eyes on him without distractions.  He does wonderfully up there but I wasn't ok with him sleeping up there until we had a few things figured out.

Now that he can scale the ladder faster and with more confidence than I can, I felt we were ready to move forward. 


Two issues here.  The accordion door and the queen mattress.

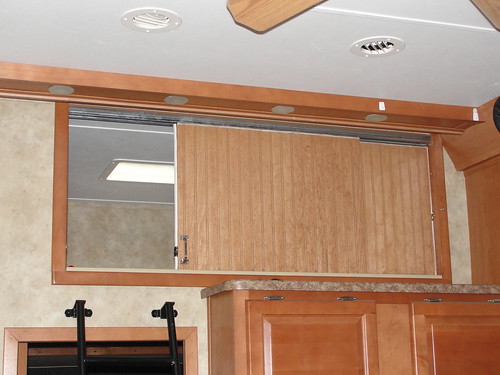
Our first big problem was the door.  This photo above was taken when we first got the RV and if you look, you can see the accordion door folded away on the right side of the loft opening.  If LJ were to roll out of bed (which is rare), and roll over to the door, that little accordion door would not hold him in at all.  It is, after all just flimsy cloth.  I figured we needed a solid barrier to keep him from rolling out - and a proper door to the loft would also serve as a better sound barrier than cloth.  I really wanted to use Tambour which is what they use for roll top desks, but unfortunately that plan didn't come together so well.  We may still do it in the future but for now we just built sliding doors.

Errr...

Marty built sliding doors.
The Loft
The doors are on tracks at the bottom and top so they won't swing out.  If you roll against these puppies, their solid and won't let you fall out.  We put weather stripping on the sides and trim on the bottom to seal the light out. Actually we still need to add one last trim piece to the top on the outside here.  We also notched out holes in the trim and put magnets in the door and door frame to hold the doors closed when we're traveling down the road.  The magnets are really powerful, but LJ can still pull the doors open so that worked out really well.

The other problem was that queen bed.  Ugh, that. bed...  I really really really loathed making that bed.  If you wonder why, let me challenge you to making any bed without actually getting off the bed for 75% of the making.  And then having to do it crouched over for all 100% of the making because the head room is cut short.  LJ is just way to small for a queen bed anyway.  So we moved that mattress into the garage and stacked on top of the top bunk where it's up and out of the way.  We don't use the bunks in the garage at all, they stay lifted up against the ceiling leaving loads of room to walk around so that was a good spot for the mattress.  Should we end up needing it, it's still around.
The Loft
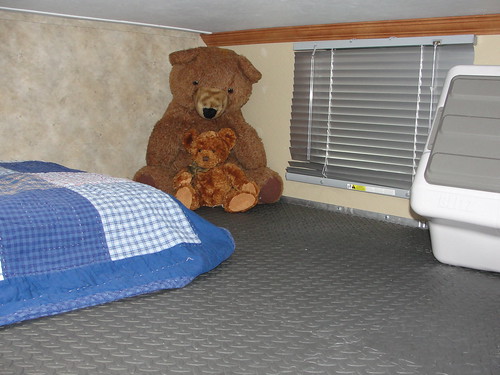
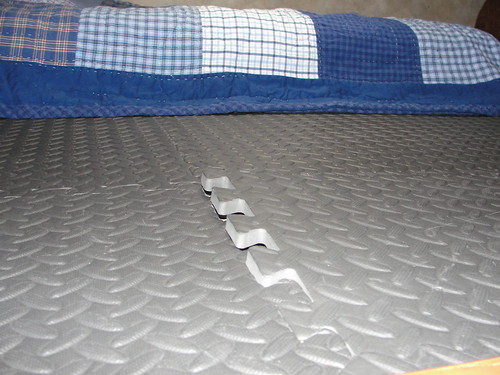
Next we went to Home Depot and picked up some soft puzzle flooring that doesn't hurt your knees to crawl around on.  The puzzle flooring is thin and by taking out the mattress we gained a pleasant amount of headroom up there.  Well, LJ can sit on the floor or the bed and not have to worry about hitting his head, so it's really Marty and I that are excited about more headroom up there.  We love reading stories at bedtime up there and the occasional moments of goofing off.

After the floor was finished we put his toddler mattress up there and toy box.  For added safety we put one of our video/audio baby monitor cameras up there on the door until we were able to purchase door alarm dingers.  The alarm doesn't lock him in the room, but notifies us in the middle of the night should he wake up and open one of the doors.  We are so happy with this set up and more importantly LJ is over the moon for his new space.  Even though he's been allowed to play up there for months, it was never super exciting to him until now.

I'd still like to add some extra touches, like curtains and maybe some little boy wall art, but for the most part, this is it.

I give you LJ's new room...
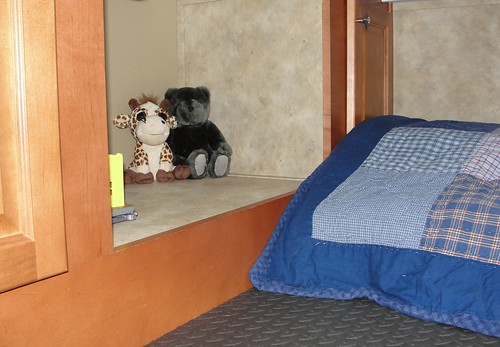
The Loft
The cabinets and shelf in between are just extra places to keep his toys and drive his cars on. 
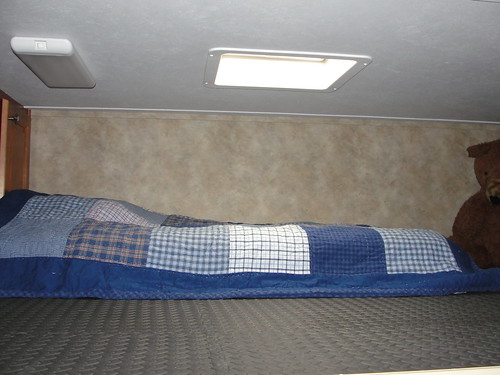
The Loft

The Loft
The tote to the right is his toy box.
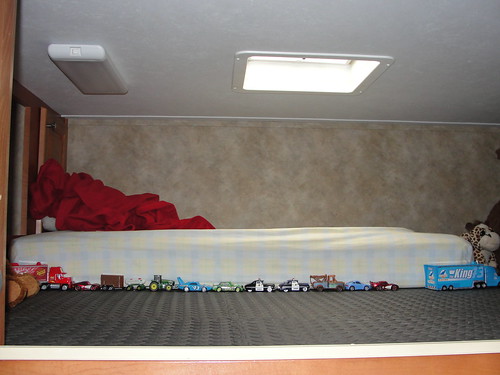

And here you have a small window into his imagination.  Cars, cars, cars.

Thursday, July 14, 2011

RV Modifications & Add-ons

I had to share a couple neat ideas I've seen around the RV park lately.


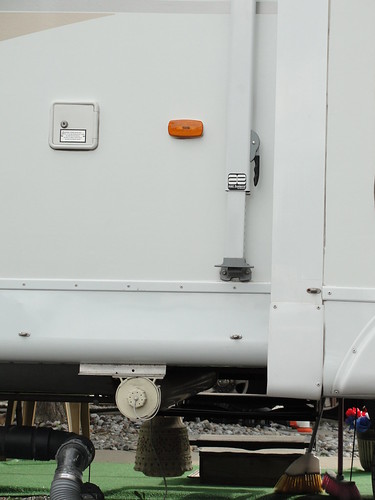
This is our neighbors RV.  See the pipe with the white cap?  He took some regular pvc pipe (4"?), mounted under his RV and now stores his sewer hoses in there.  Great idea, those hoses now have their own space, and can't accidentally contaminate anything else in the storage area.  Perfect.

I was thinking you could also use one for fishing rods, the tie-down bracket/rods that are suppose to go in our garage, and anything long and awkward like that.
-----------------------------------------------------------------------


Another thing I've been noticing...


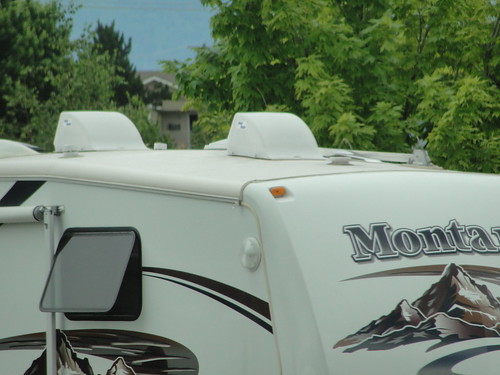
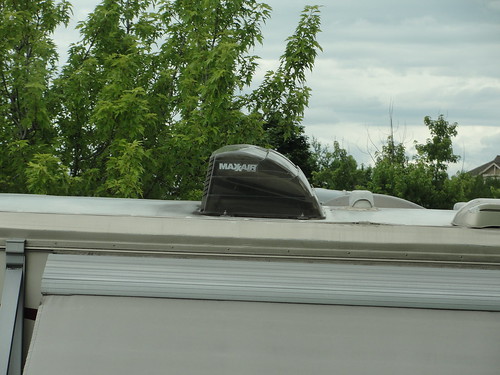
These are "RV Vent Covers".  I was so excited to discover these on several of our neighbors RV's!

With no vent covers, every time it rains you have to close your vents, even if it's sweltering outside and you need that vent and fan pulling in a breeze.  And if you don't have a fantastic fan that automatically closes when it senses water, you can count on coming home to a wet floor or a wet spare bed at some point in your future.

So with the covers, you just mount them over your vents and never worry again.  EVEN if you hit the road forgetting you left your vent wide open (which I've already done since we got the covers) it doesn't hurt a thing.  Vent covers allow your fans to pull in a breeze, keeps the rain OUT, and it has screens on the vent cover in addition to the screen the vent itself already has, so you end up with a double bug barrier.

I LOVE the RV vent covers and they come at a great price.  If you don't have one for your RV, I'd highly recommend running out and picking some up.

Wednesday, December 22, 2010

More "Hanging" Around the House

Ok I decided to do one more post about the stuff hanging around the house, lol. The last RV we lived in never had anything hanging on the walls. Marty was pretty particular about not putting holes in the walls - and I never argued one bit. After all, it's not like sheet rock, you can't just get some putty or paint over the holes. Well I guess you could, but you get my point.

Anyway with this RV I just really wanted to do it differently, make it more a home instead of just factory decor. But we still don't want to put a bunch of holes in the walls. I don't always stick to my decor decisions, lol.

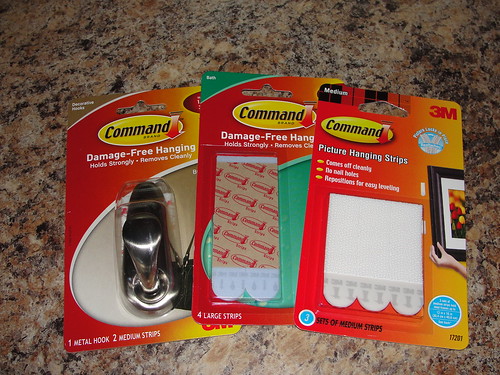
Anyway we found these!
Wall Hangers
These are sticky strips you can use for just about anything. They come in velcro/sticky strips too. You can stick your things to the wall, or stick a hook to the wall. They hold I think up to 10lbs. The best part about them is when your done and want to take it off the wall, you pull a tab attached to the sticky part, and it releases the stick without ruining your walls. We love them!

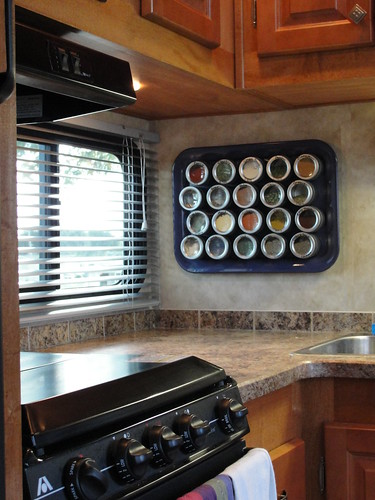
So far we've used them to hang our spice rack...

This is just a metal TV tray with magnetic spice tins (found at Bed Bath & Beyond). It's a great way to save space in my cabinets. I painted the tin purple but I'd still like to add a bit more to it, as it is a bit plain. I think it weighs 2-3 lbs? I got this idea from Sara of the "Happy Janssens". Her spice rack is really neat looking and is pictured here and here.

We've also used these command strips to add hooks in different places for hanging keys, Christmas lights, I even plan on adding a few in the closet for my purses. You can get hooks in all sizes and color so the Christmas lights were not hung with the huge hook above but something smaller that blends in pretty good. It says they don't work on wall paper, but I'm pretty sure that's paper on our walls, and they stick to it great!

We hung the spice rack and these frames below with the velcro style.

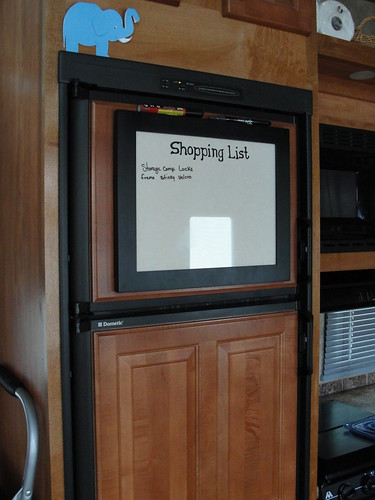
Photo Frame Whiteboard
This is my shopping list, which hangs on the fridge.

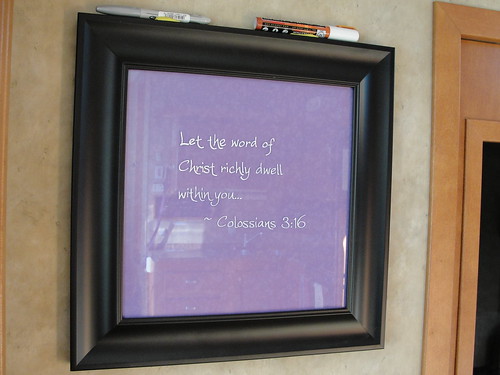
Photo Frame Whiteboard
This is the frame where we share a favorite scripture.

Both of these frames are real photo frames, with real glass in them. We use them like a whiteboard and write on top of the glass. They probably weight a pound or so and haven't budged in all our travels. Someone with a very crafty knack pointed me to this website for the idea and I fell in love with it. You should see the original posted on her website, it looks much cuter than my frames.

I'd like to find better scrapbook paper to put behind the glass but this is all I could find for now. Expo markers work great for writing stuff and being able to wipe it off with my finger - the grocery list is written with expo. Chalk paint markers work great on titles for really standing out, and it won't wipe off with the flick of your finger - it still comes off very easily but you need a wet towel to wipe it off, or your fingernail to scrape it off. I am using chalk paint for the scripture frame and the title "Shopping List" as I don't want those to come right off if brushed up against.

The velcro backing is great for the frames, so when I find better scrapbook paper that grabs my eye I can just pull the frame off the wall, replace the paper, and stick it back up using the velcro that's already on both the frame and wall.

I am not much for being a talented housewife and stay at home mom, but I can sure hold onto other peoples good ideas and use them all I can!

Monday, November 29, 2010

Jack Rabbit Bed Cover

This is one of those post where I share one of the things that make life on the road so much easier, not to mention puts our mind at ease.

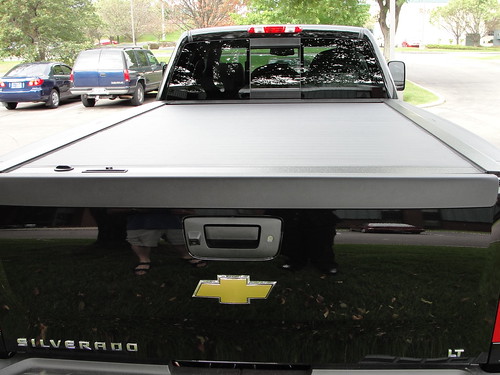
Meet the Jack Rabbit.

During our move down to the states I drove our loaded Suburban from Alaska to Idaho to pick up our new dually and trade in the burb. It was exciting and sad all at once, we loved that Suburban. The problem was we still had to drive from Idaho to Indiana to get our 5th wheel. All the stuff I had loaded in the burb had to switch to the back of the truck, which is a lot of miles for my valuables and personals to be unsecured and unprotected - from both the elements and anyone with a hankering for other peoples stuff.

We looked into toneau covers but just didn't like them, they were either bulky and awkward or flimsy and not much better than a tarp - and what would we do with it when we hooked up the 5th wheel?

Marty finally found an awesome solution, neither of us had ever heard of before. A roll-top bedcover! How perfect is that?

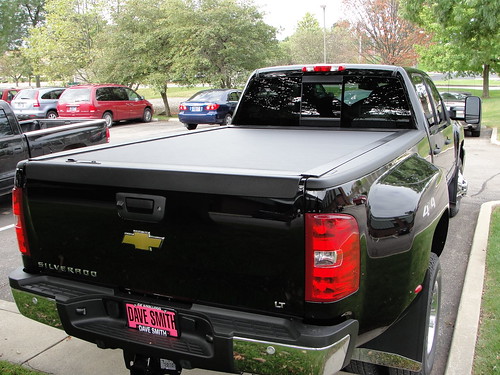
  • It rolls open and close like a roll-top desk, only it's made out of metal and has some type of rubber/plastic/rhino coating and matches the truck perfect.
  • It comes with a lock to keep it secure as does our tailgate. I don't have to worry about anyone or anything getting into my stuff.
  • It's waterproof and keeps water completely out of the bed.
  • It has 5 locking positions, so if we're hauling our 5th wheel we can cover the front of the bed and leave the back half open
  • It's amazing.

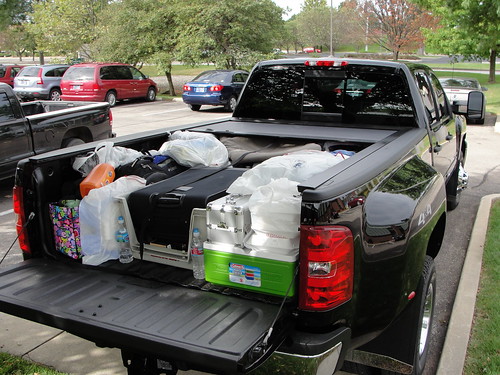
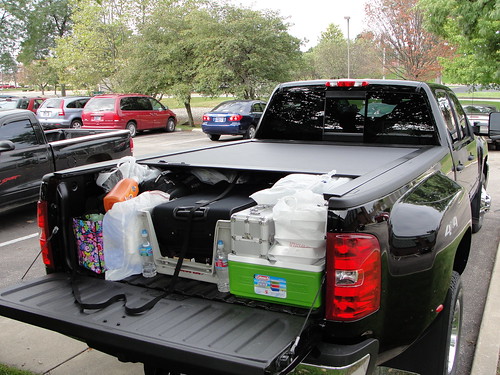
This is all of the stuff I hauled from Alaska.


What a mess huh?

We also had somethings shipped, but this is all of the stuff I needed for the 2 months we were on the road without our 5th wheel. Packing it all in was a tricky, tricky process, lol.

And by the way, I am NOT this messy in real life, lol.

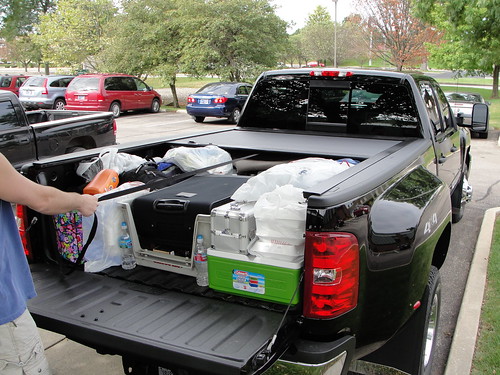
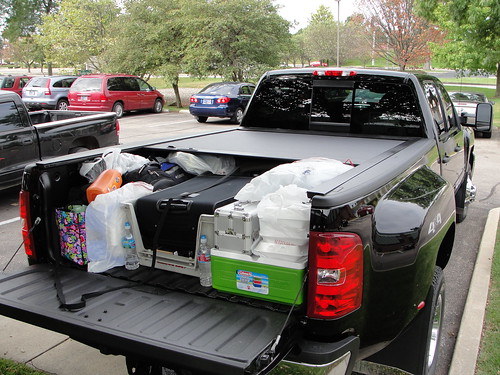
The pictures below shows each of the stopping/locking positions along the tracks...

Position 1.

Position 2. This is the nylon strap used to close it, it slides really easy and doesn't take any effort at all.

Position 3.

Position 4.

Position 5.

Now looky there, doesn't that look all neat and tidy? If I hadn't shown you, you'd never know what a mess we have hidden under there would you??

Again, we don't have that mess back there any longer, but with storage being a hot commodity around these parts we do keep the stroller and a few other things back there. It's also great for when we're out shopping with a full cab.

If we weren't a family on the road we probably would have skipped it, but this is one of those things that makes life less complicated and more worry free.